

Picking in three.js
A large part of our software helps the user prepare their models for printing. We use React and three.js to build a user interface where users can support and lay out their parts before sending them to the printer. One of the more difficult challenges we have faced is how to determine what the user is hovering over in the three.js scene. For DOM elements, it is easy to add onMouseEnter and onMouseLeave event handlers to detect when the user moves the mouse over the element. Unfortunately, it is much more difficult to determine what mesh the user is currently hovered over in three.js.
RAYCASTER
The most common way to detect what the user is hovering over is to use the three.js raycaster class. Raycaster takes in a mouse position, a camera, and a scene, and returns a list of meshes that the user’s mouse is intersecting, and where the intersection is on the mesh.
This was very helpful because sometimes we only care what the user is clicking (such as when they are clicking parts or supports to select them), but other times we care about where in particular the part is being clicked (such as when the user is selecting areas to support). Furthermore, the raycaster class was very easy to use and never returned any unexpected results. Unfortunately, we could not use the default raycaster class because of performance implications. Our customers sometimes upload models with millions of triangles, and we render tens of millions of triangles at a time. The three.js raycaster is not backed by any spatial data structure so it has to test for intersections for every triangle in the scene. If we ran the raycaster on a mouseMove event, the UI would hang because it can take many seconds to compute all the intersections.
GPU PICKING
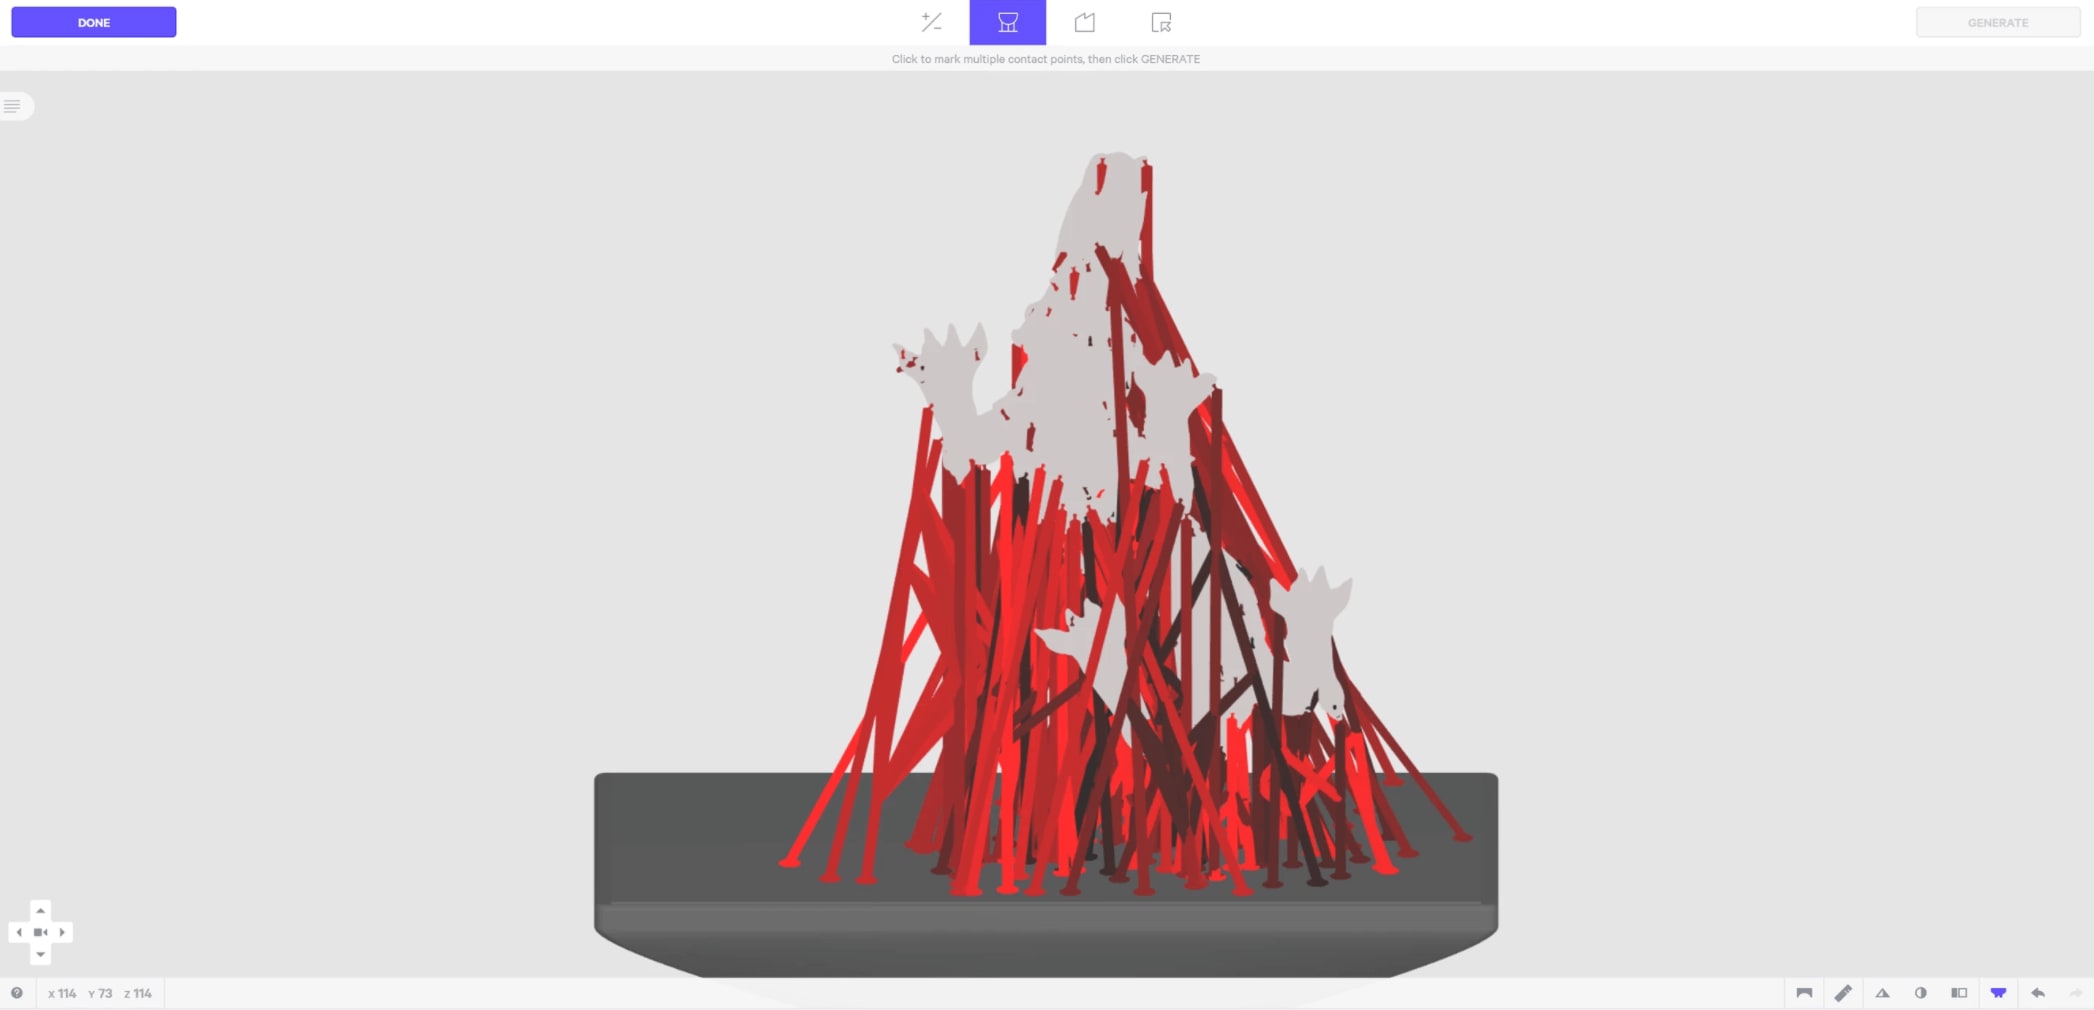
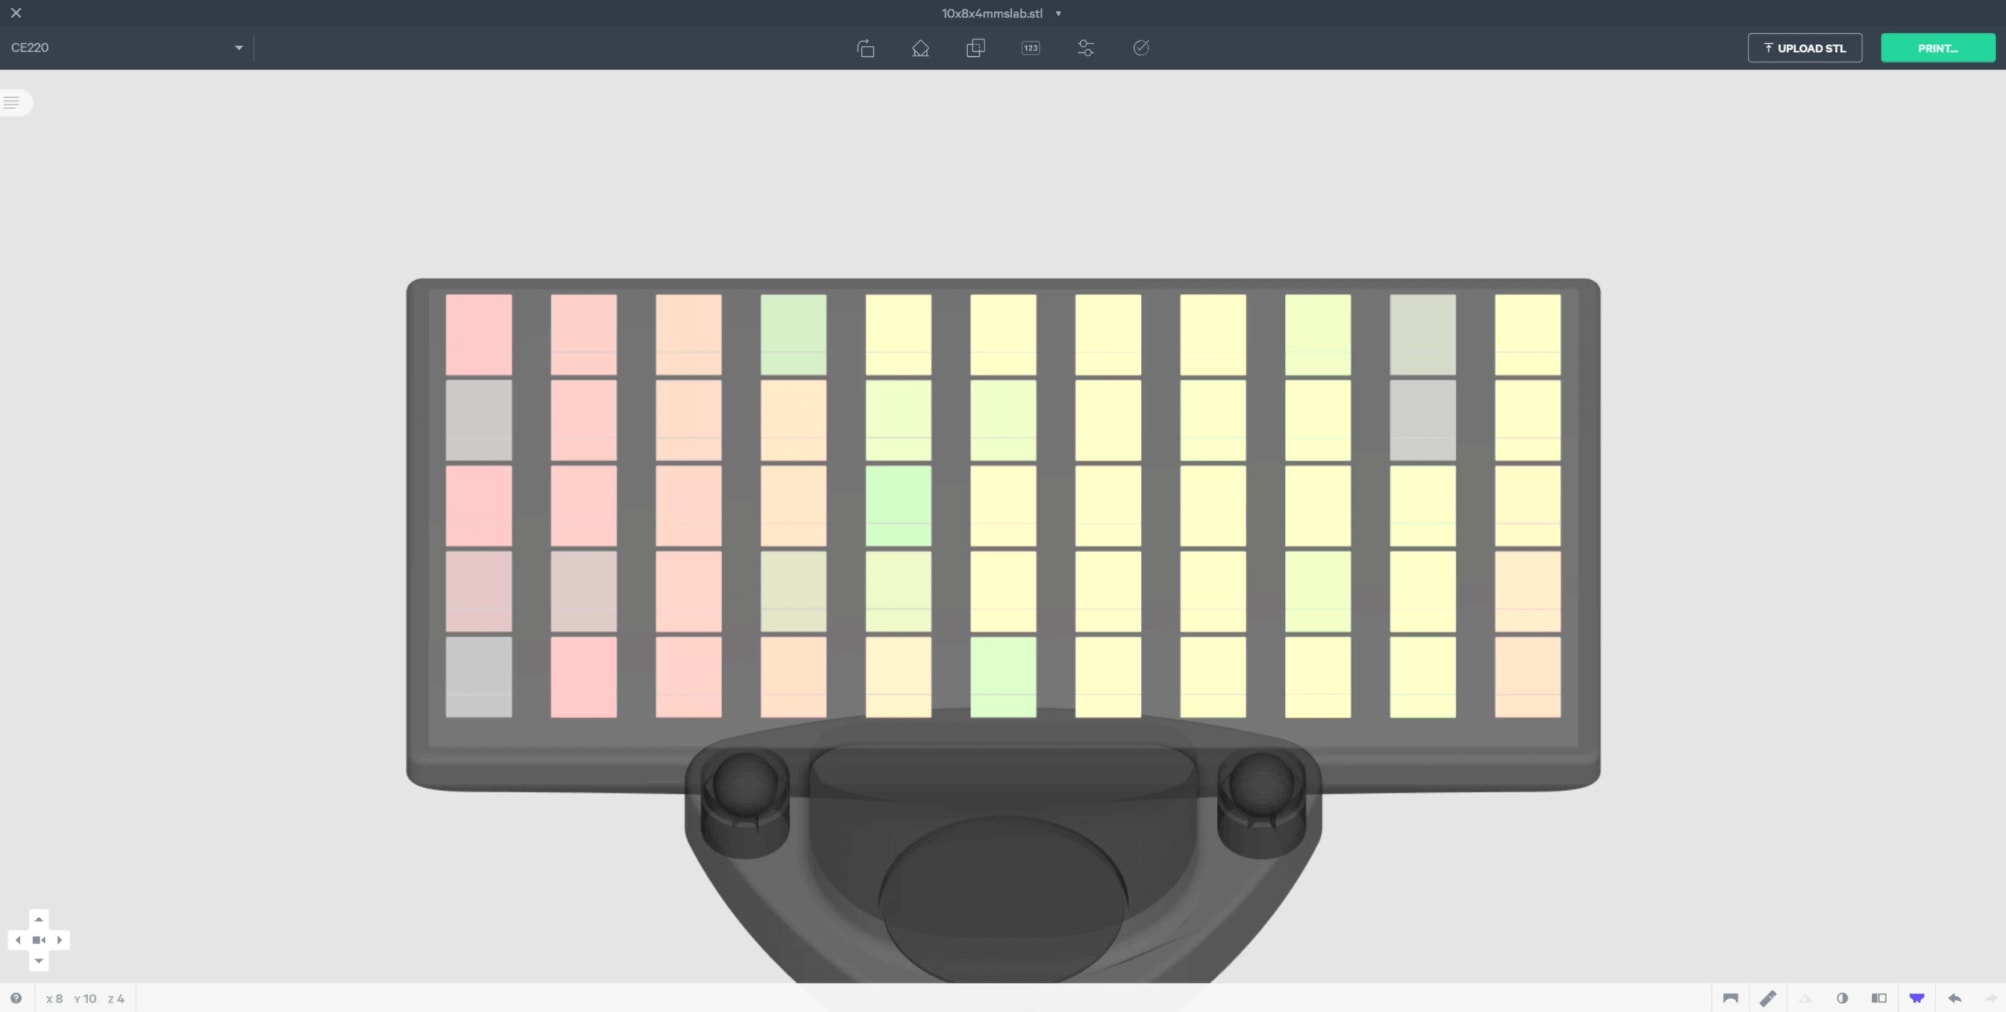
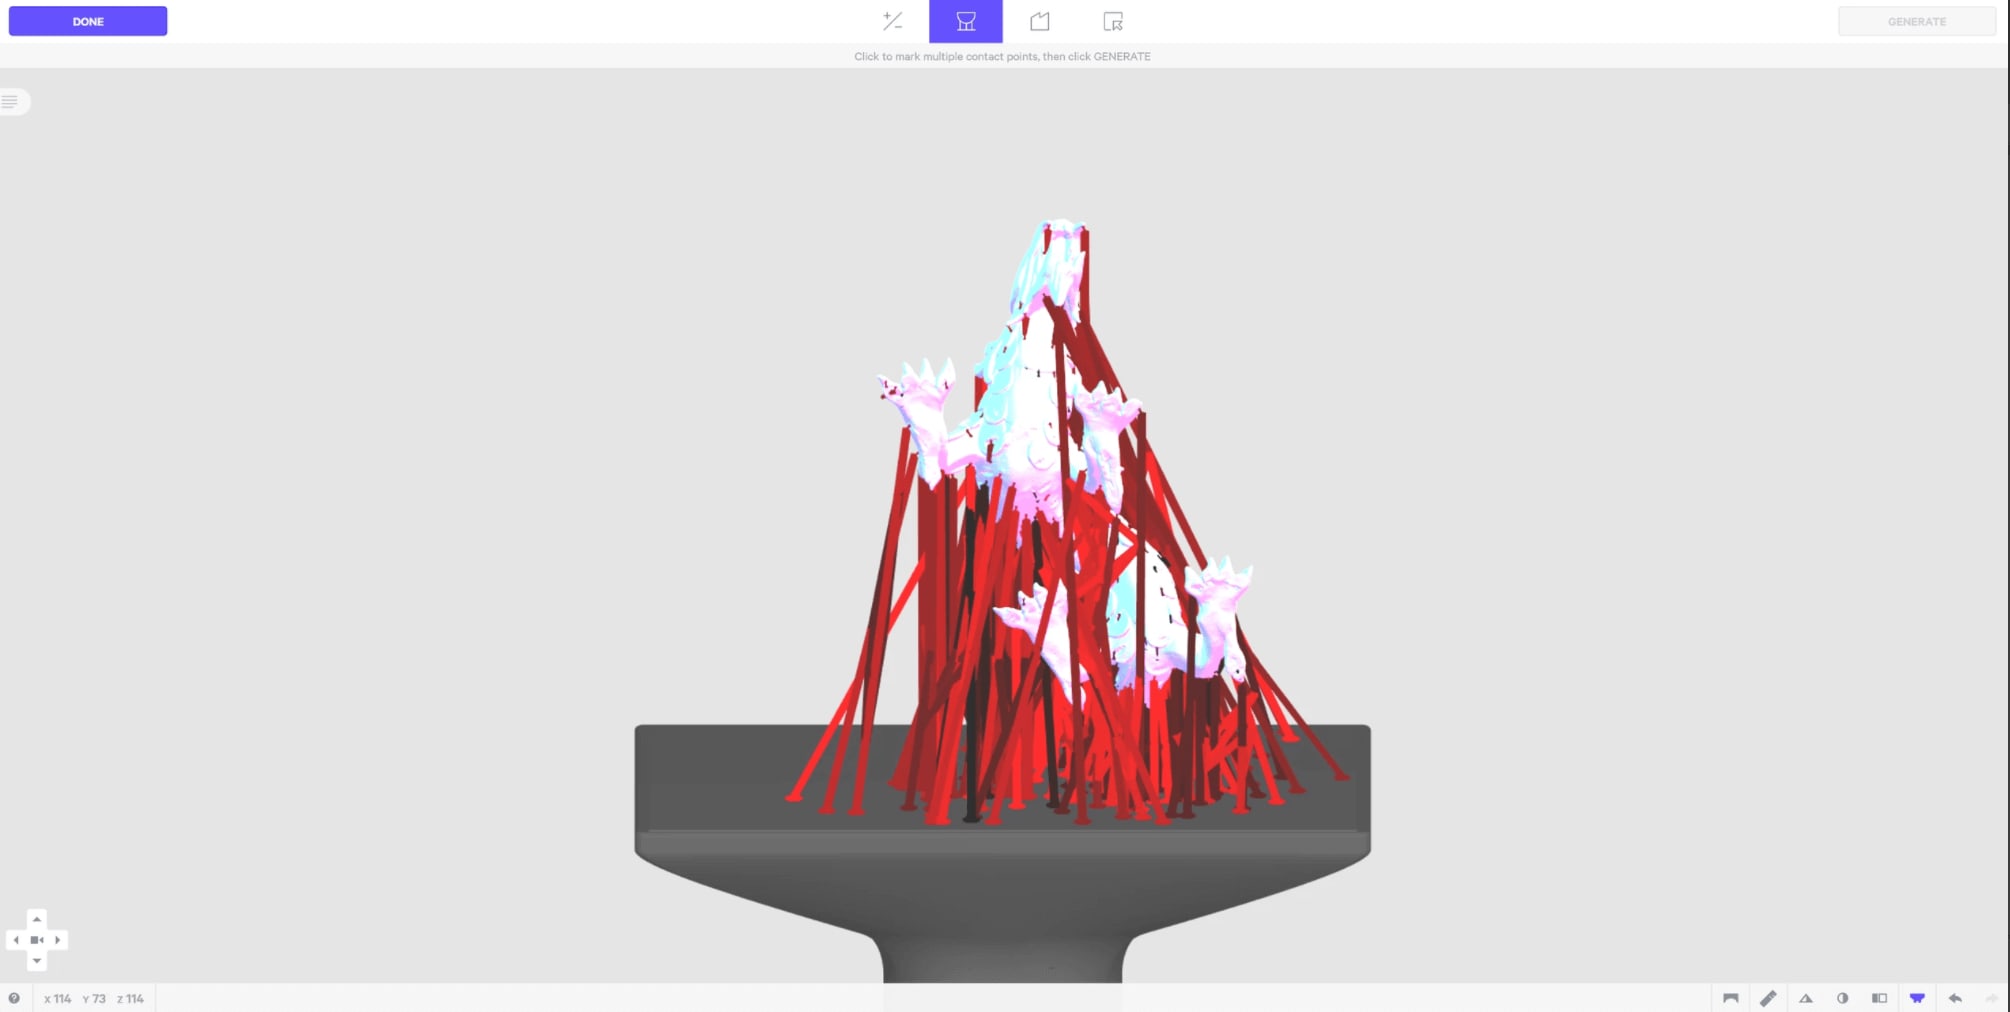
One alternative to raycasting is picking with the GPU. Generally, this means instead of computing all the ray/triangle intersections on the CPU with javascript, we use the pixel color to figure out what the mouse is currently on top of. For example, if we render every object a slightly different color, when the user moves or clicks on an object, we can read the color of the pixel to determine what the user is on top of. We can do this rendering in a different renderTarget because we do not want to affect what the actual scene looks like. In our software, one of the things we need to detect is which support structure (purple bar in image above) the user currently has their mouse on top of. To do this with GPU picking, we have to set up a way to color things differently and also look up the color of the object currently under the mouse.
We start off by initializing a new render target and a pixel buffer. The render target is where we will render the scene so the user does not see the effects of GPU picking, and the pixel buffer array will store the results of the rendering so we can index into it to determine the color of the pixel under the mouse. For each pixel rendered, the pixelBuffer holds an r, g, b, and a element in the array (which is why its width is 4 * width * height).

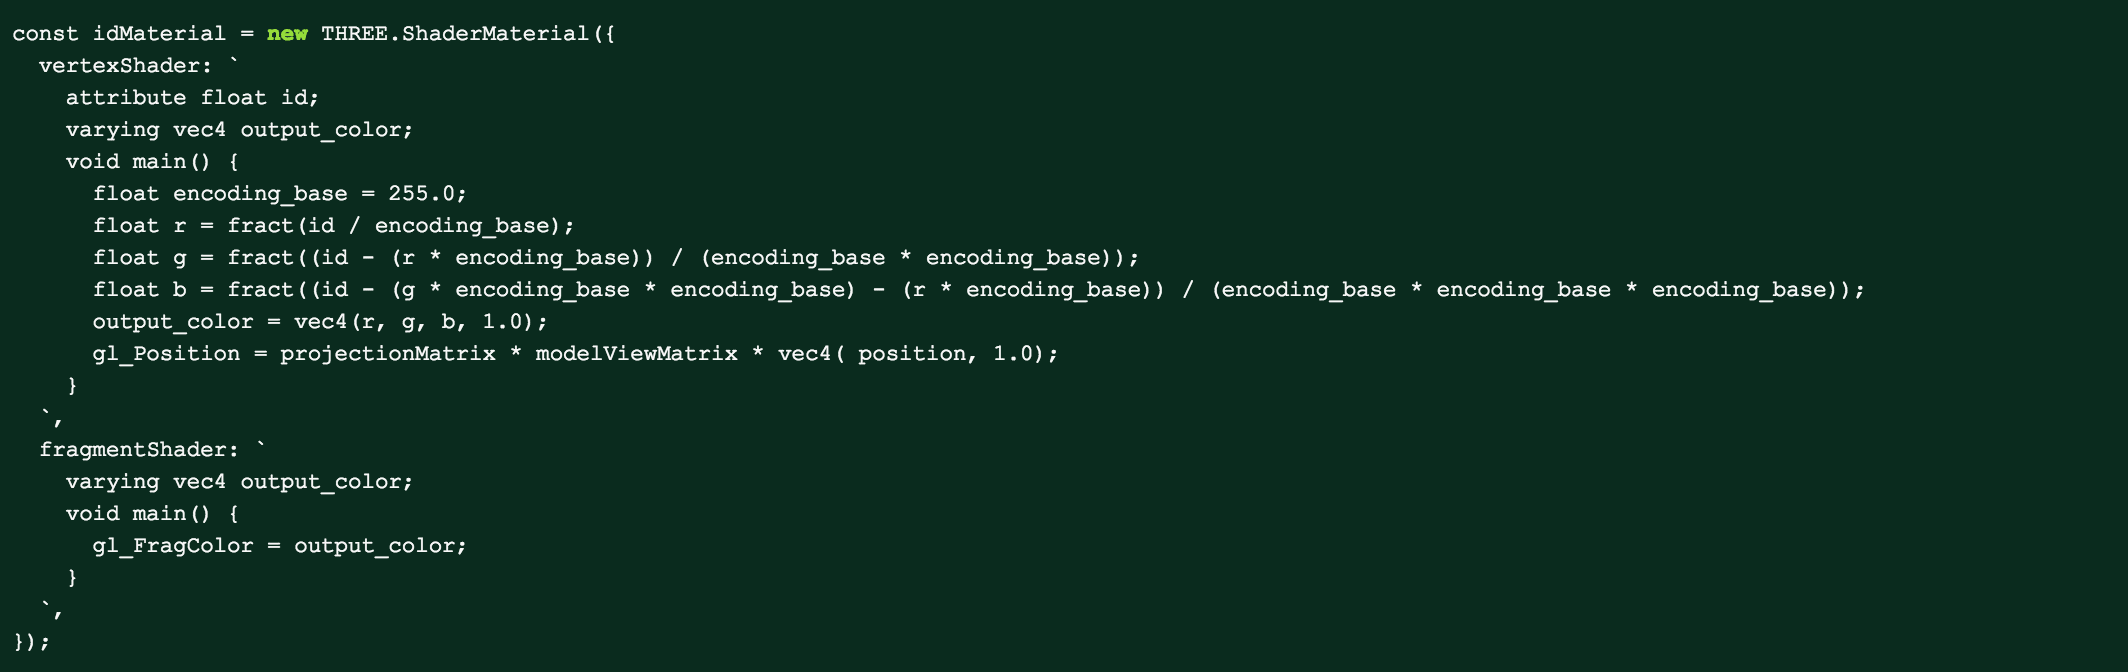
To change the colors of the objects in the scene, we create a shader that renders color based on the id of the object. The id is passed in as an attribute to the vertex shader and gets converted into a color by converting it into a base 255 and storing these components into RGB values.
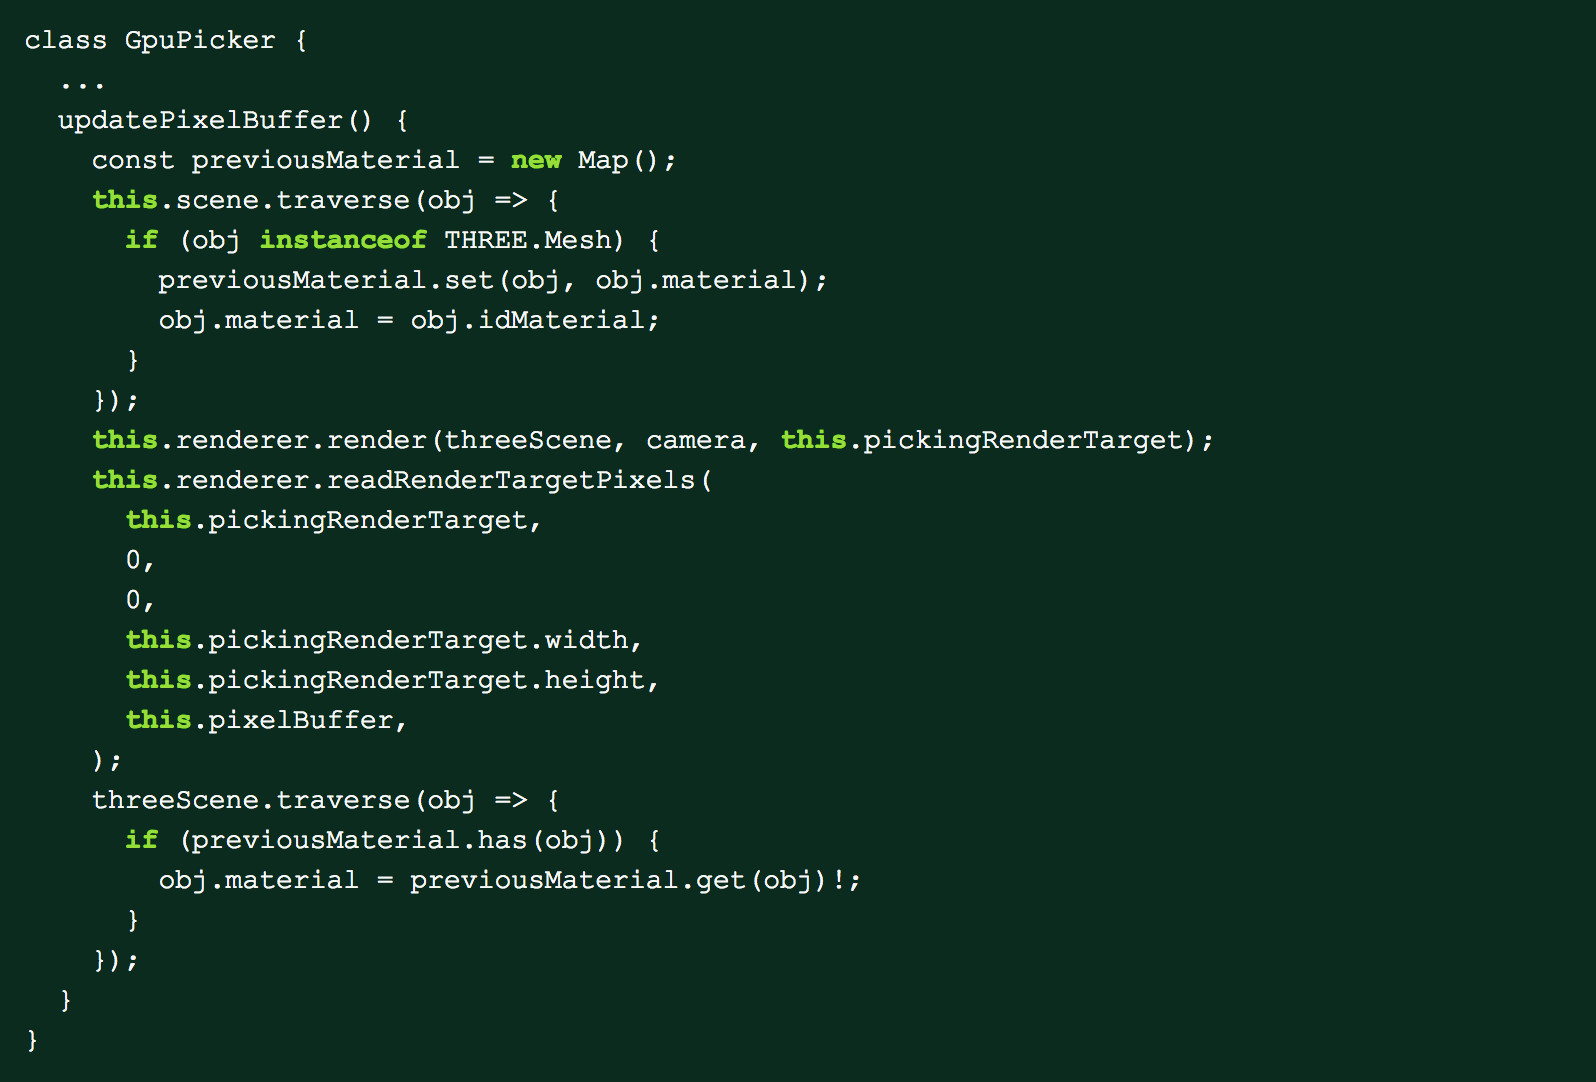
We now need a way to render the meshes in our scene with the new id material. First, we traverse the scene and replace the mesh materials with our new id material. We keep track of each mesh’s old material while doing this so we can restore it after we are done rendering into our new render target. Afterwards, we render into the new render target and capture the pixel’s colors into the pixel buffer array. One of the challenges with this approach is that the pixel buffer needs to be updated if anything in the scene changes that would affect picking. For example, if the camera moves or if new meshes are added, the updatePixelBuffer method must be called or else the pixel buffer will be out of date and the result returned will be incorrect.
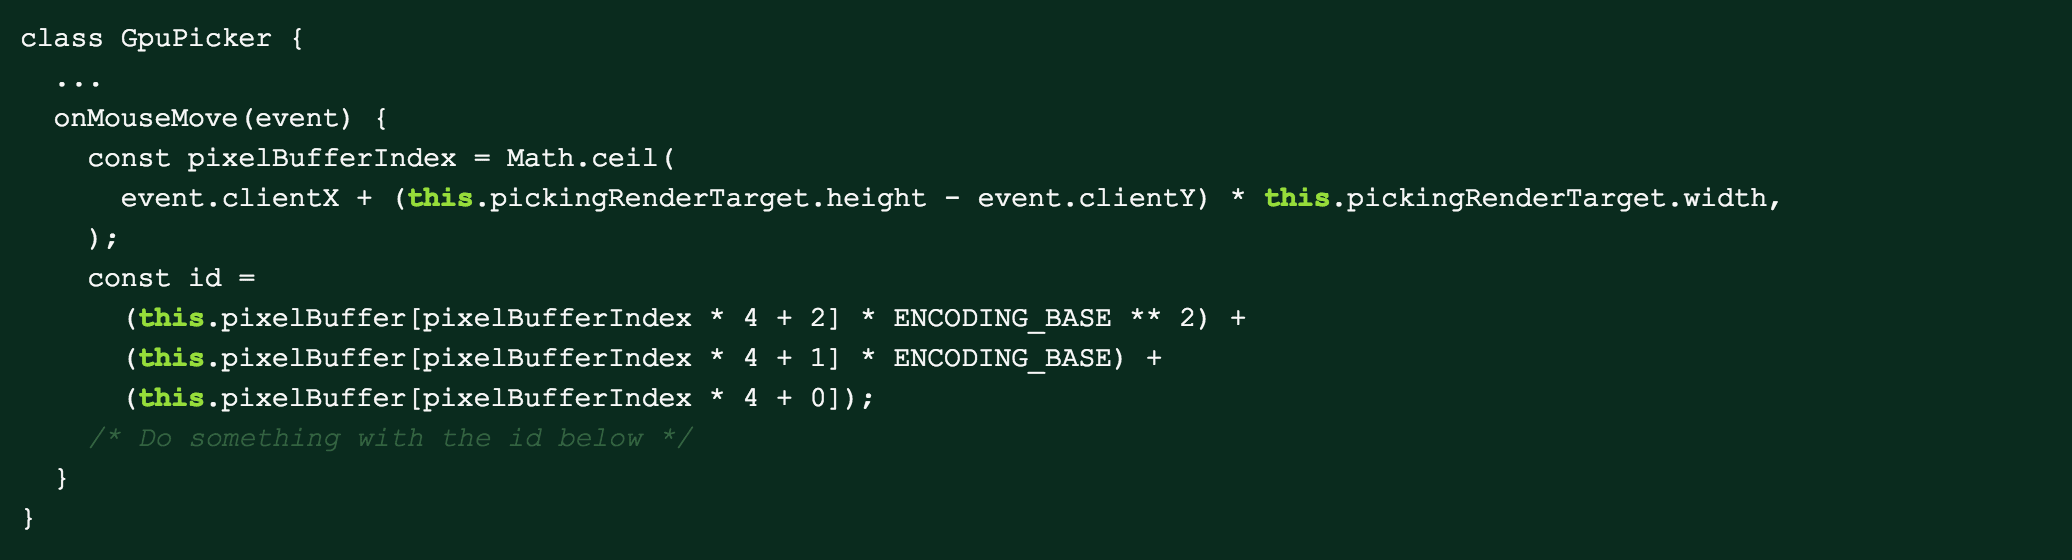
Afterwards, we just need a way to figure out what pixel the user had their mouse on top of. We do this by first converting the mouse position to an index into the pixel buffer. We then remultiply the RGB components by the encoding base to get the id that was passed in to the original geometry. Once we have this id, our application can map this back to an entity and we can figure out what the user is intending to click.
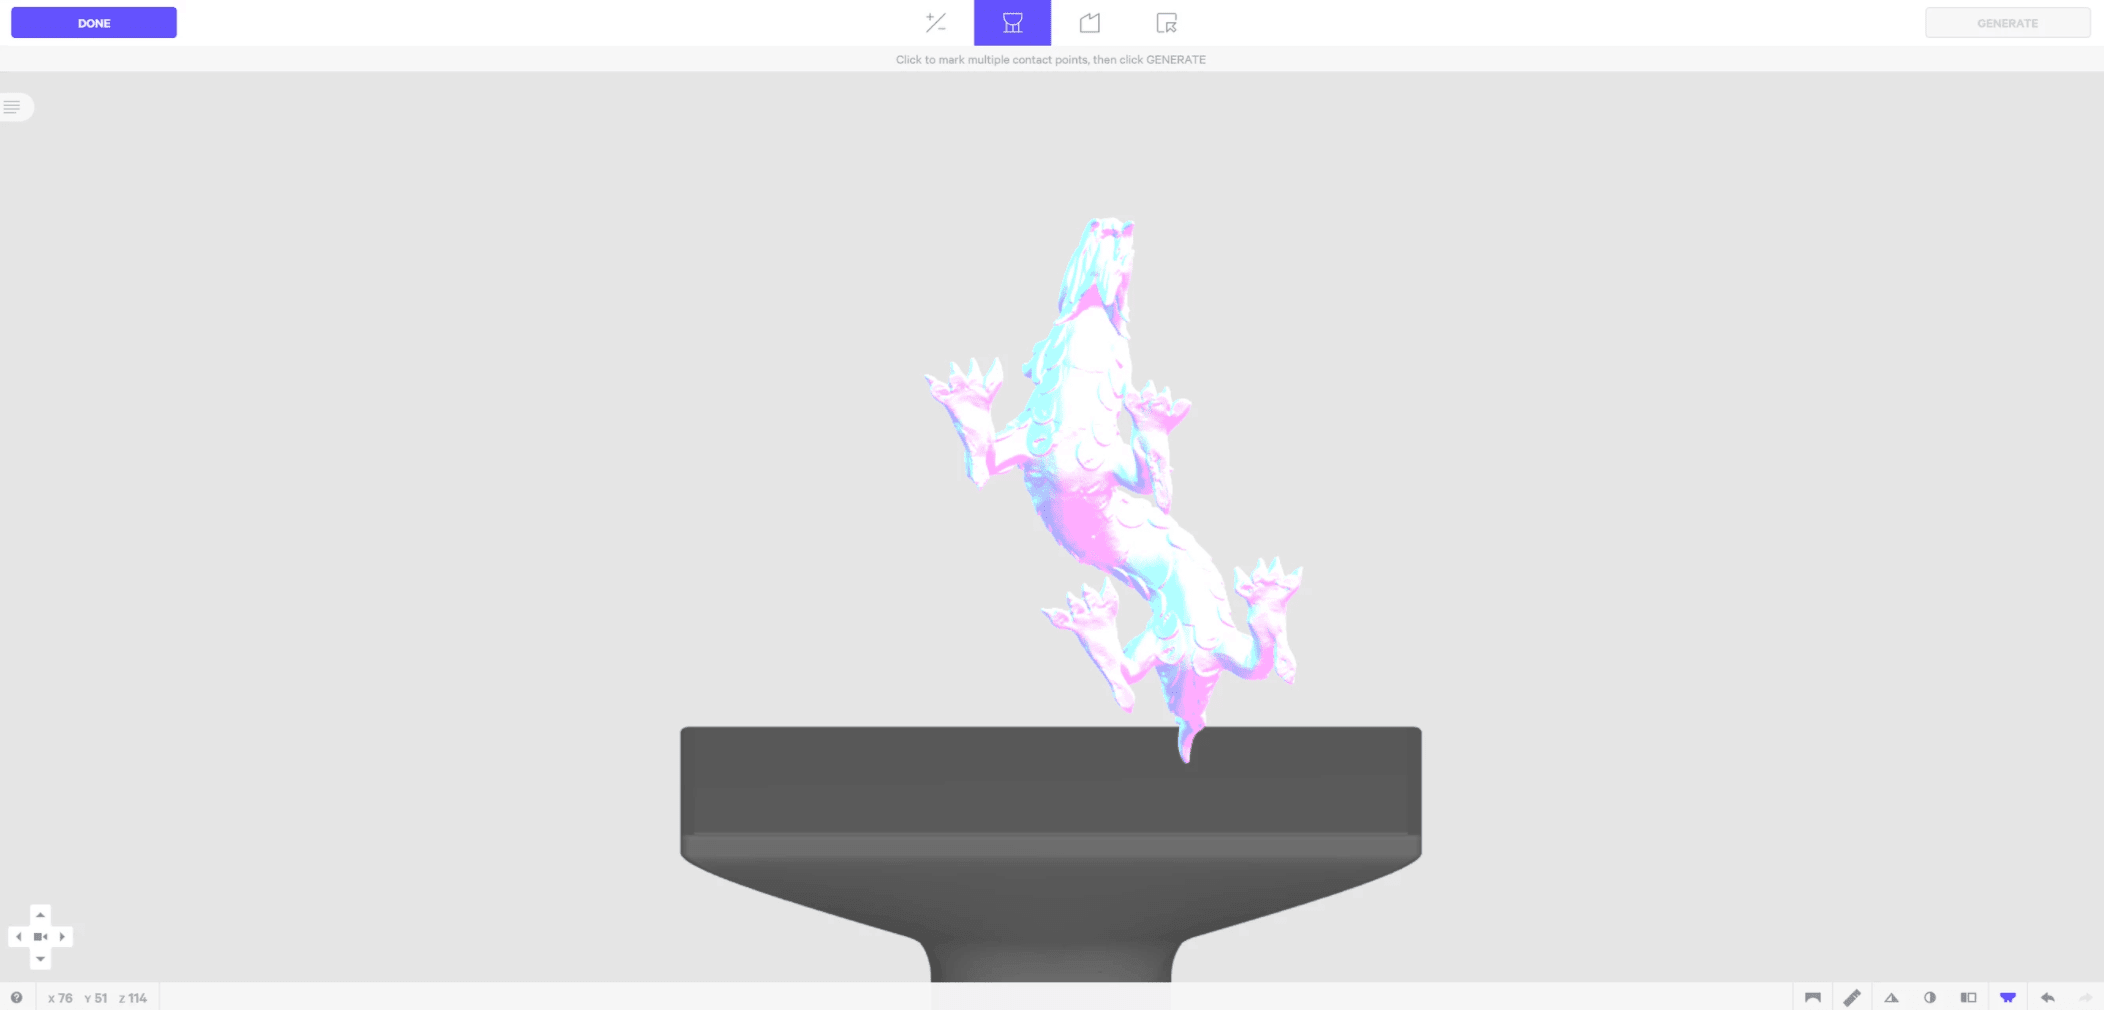
Here is an example of what the scene from before would look like if we rendered the idMaterial on the screen. You can see that all the supports are a slightly different shade of red.
TRADE-OFFS
GPU picking was significantly faster than using the default three.js raycaster because instead of having to shoot a ray through millions of triangles we only have to index into an array when the user moves their mouse. The cost of rendering to the pixel buffer is a bit high because sending the data from the GPU to CPU is expensive, but since we don’t have to do this very frequently it is still an overall speed improvement over our previous method. One of the limitations of this method compared to raycasting is that we can no longer see where the intersection occurs on the mesh. This means the GPU picker helps solve our part and support selection performance issues but does not help when we need to select regions on the part. To improve performance in those areas we would need to look at using a spatial data structure such as an octree or aabb tree.
Designing a React UI for non-traditional devices
Background
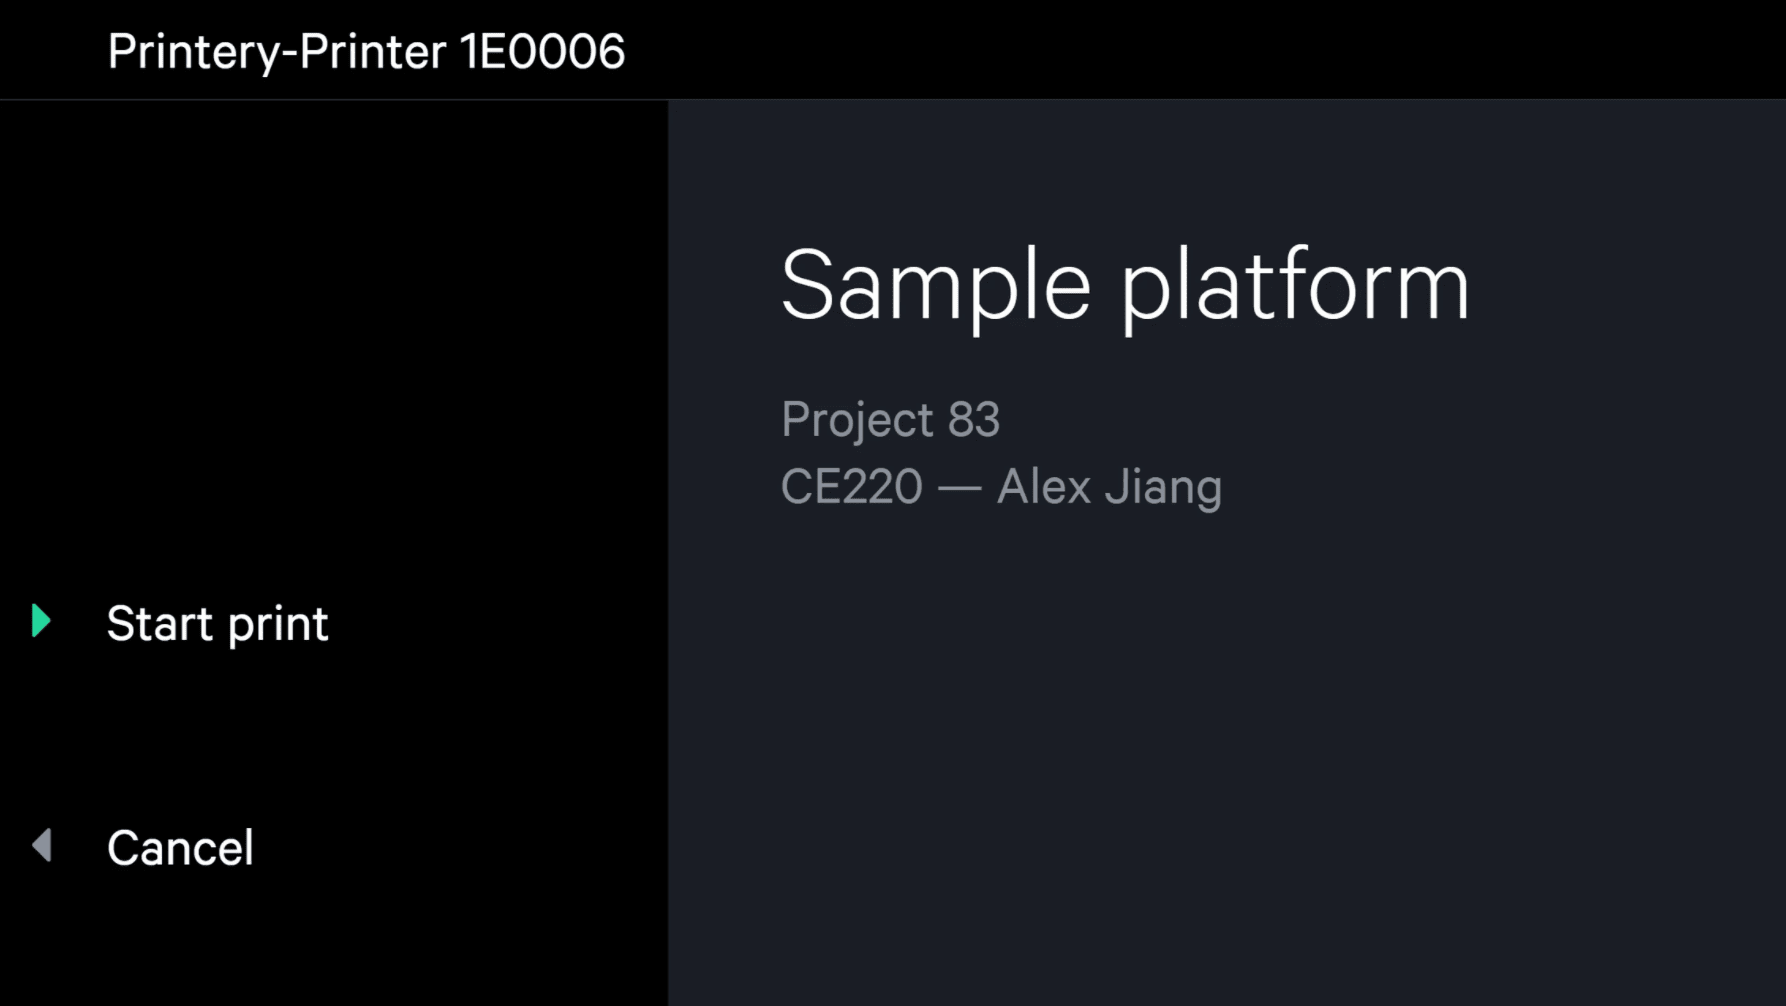
All of our printers and washers have a front display that operates the device. The device is hooked up to physical buttons next to the screen and lets users start prints, look at network details, and many other things. We built the user interface for the display primarily with react and JavaScript because of our familiarity with the framework and the ability to share code with the rest of our platforms.
How to handle user input
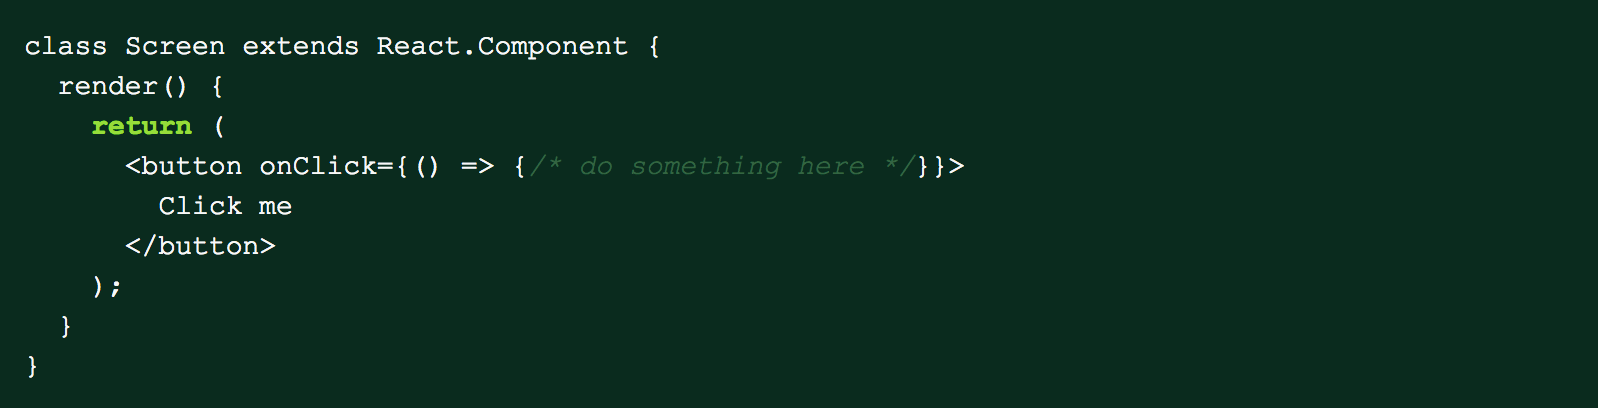
One of the challenges we faced when building the UI was how to handle user interactions. In more traditional user interfaces, you can easily attach onClick handlers to detect if the user has clicked an element or tapped on it with a touchscreen device. In React, to do something when a user presses a button is super simple:
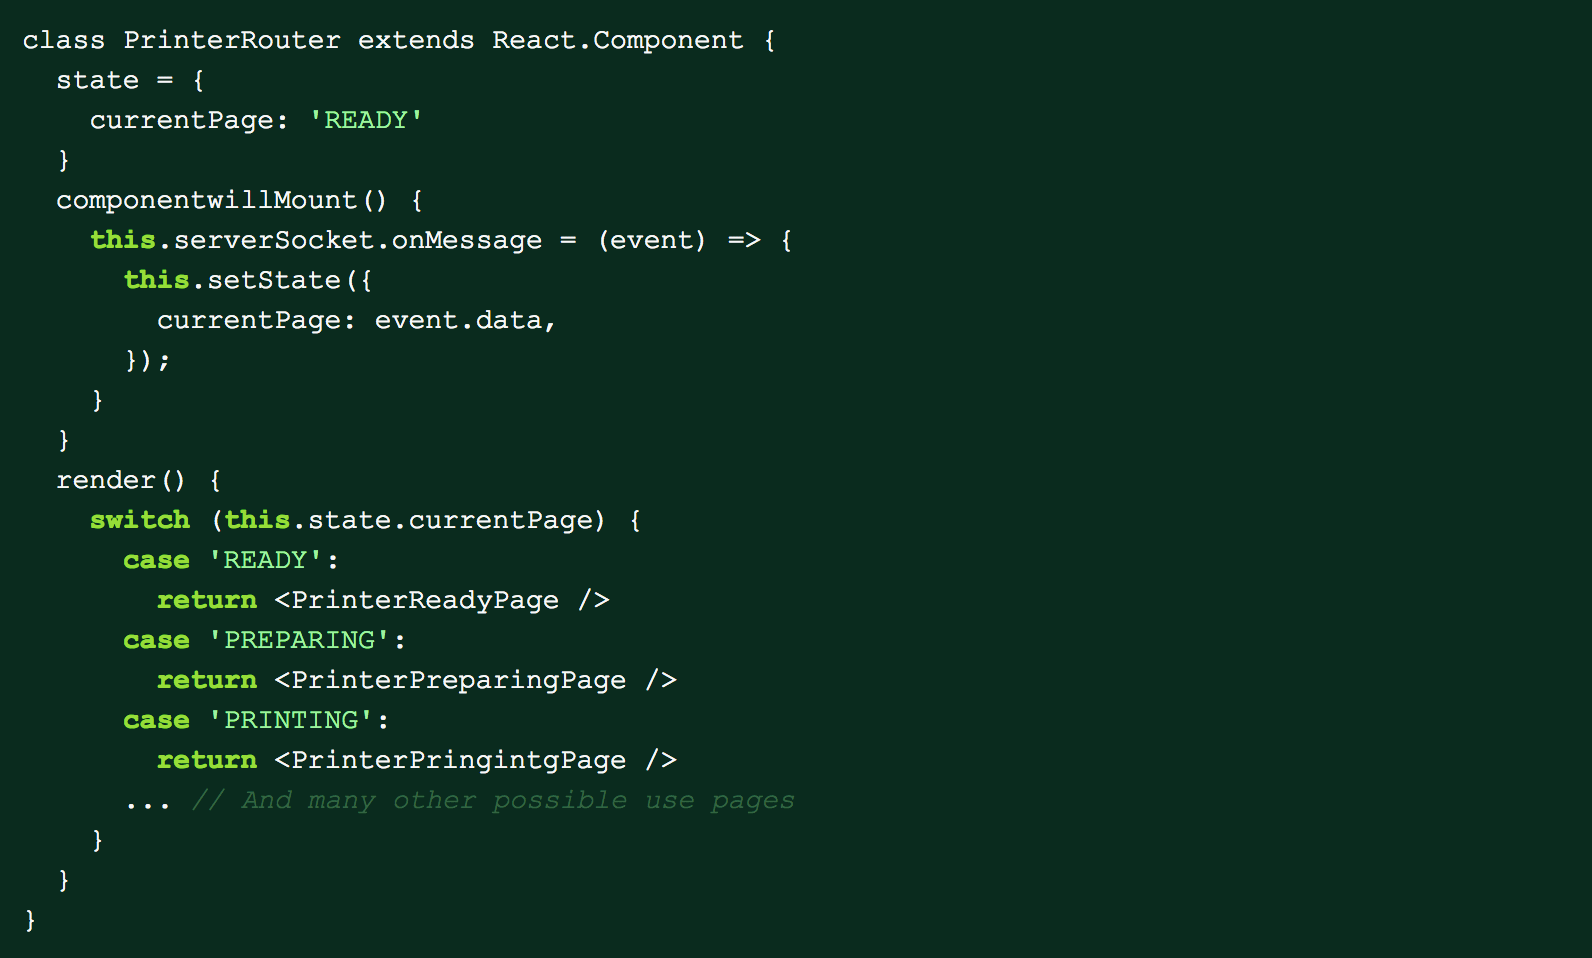
But our printer is not equipped with a mouse or touch screen and instead has 4 physical buttons. We identify the purpose of each button at any time by rendering a label on the display next to where the button is physically located on the printer. Depending on the state of the printer, the buttons perform different actions. Our web server can detect when any of these buttons is pressed. When we first started building the client and server code, the server would kick off the action associated with the button press and then update the UI. So for example, when the user hits the button to start the print, we would start the print on the server, and then send the client a message through websockets to the UI showing the status of the print. The React code would then listen for events on the websocket and change the display based on the message received by the server, working somewhat similar to a client routing library.
This strategy had many benefits because state was saved completely on the server and the client was very lightweight. It also meant that we needed no client -> server communication since all the event handling was done by the server and no user inputs were coming from the client. Unfortunately, this server-controlled workflow quickly proved to be unmanageable once our user interface had any bit of complexity. An easy example of this is adding confirmation for any button presses. The server would have to tell the client to render a confirmation page after a button is pressed and keep track of the action that needed to be confirmed.
The next step was to then forward the button events directly to the client. For the Printing page, the only two buttons on the screen are Start Print and Cancel. As a first pass we rendered the two buttons on the screen and listened for button presses from the server with code that looked similar to this:
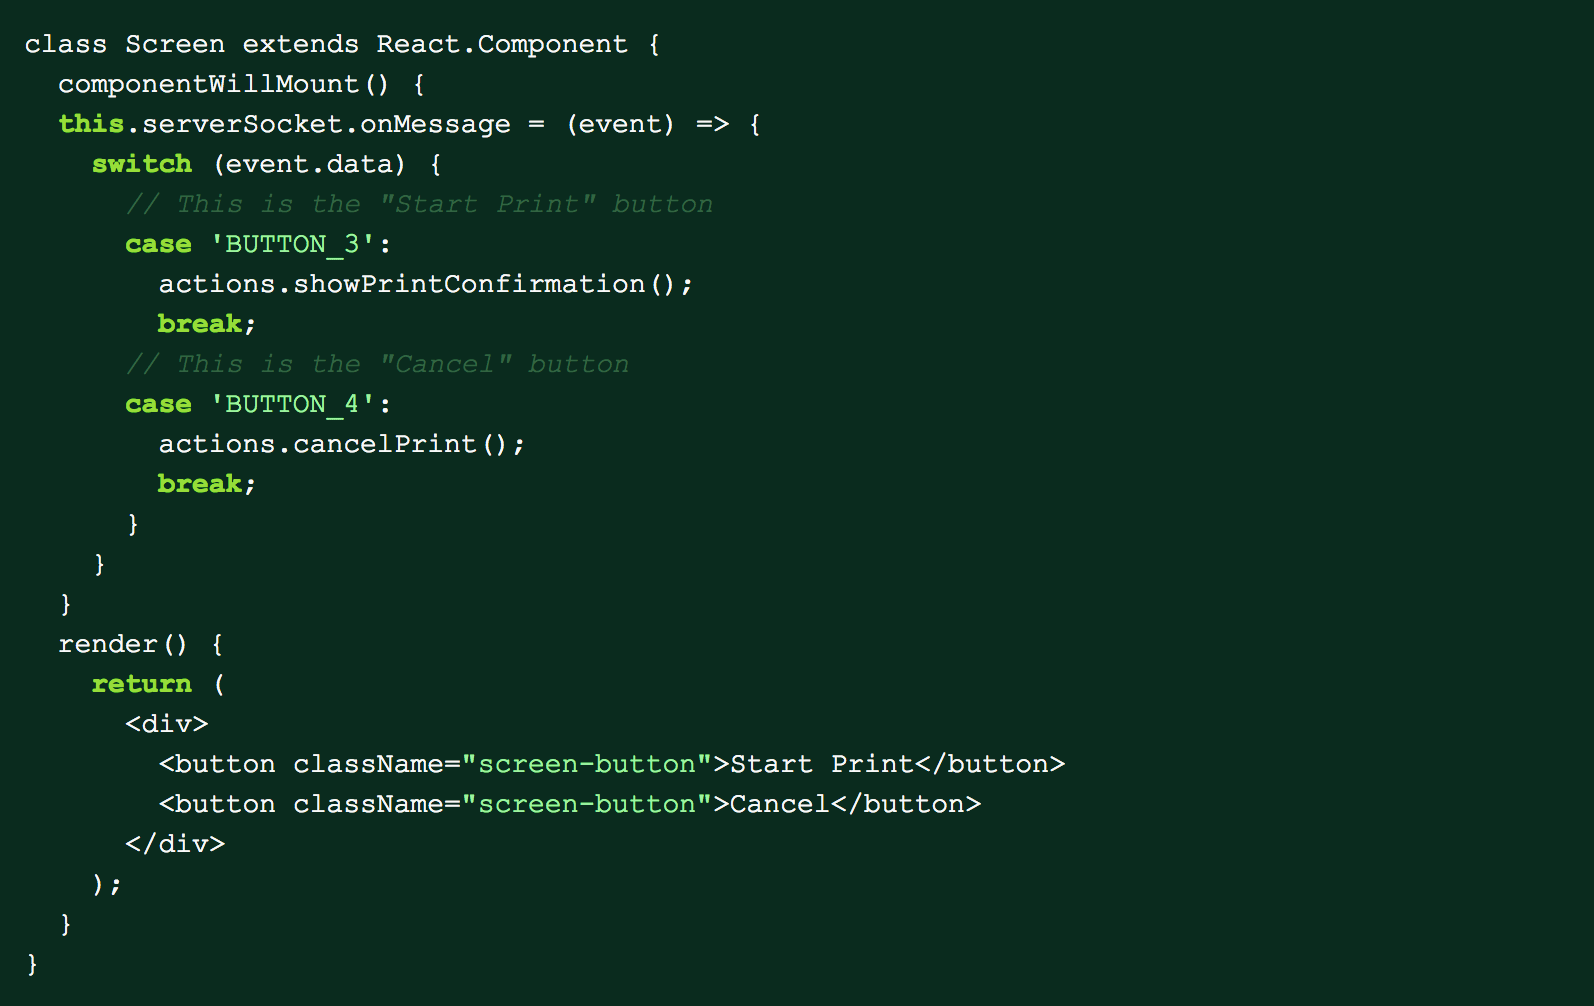
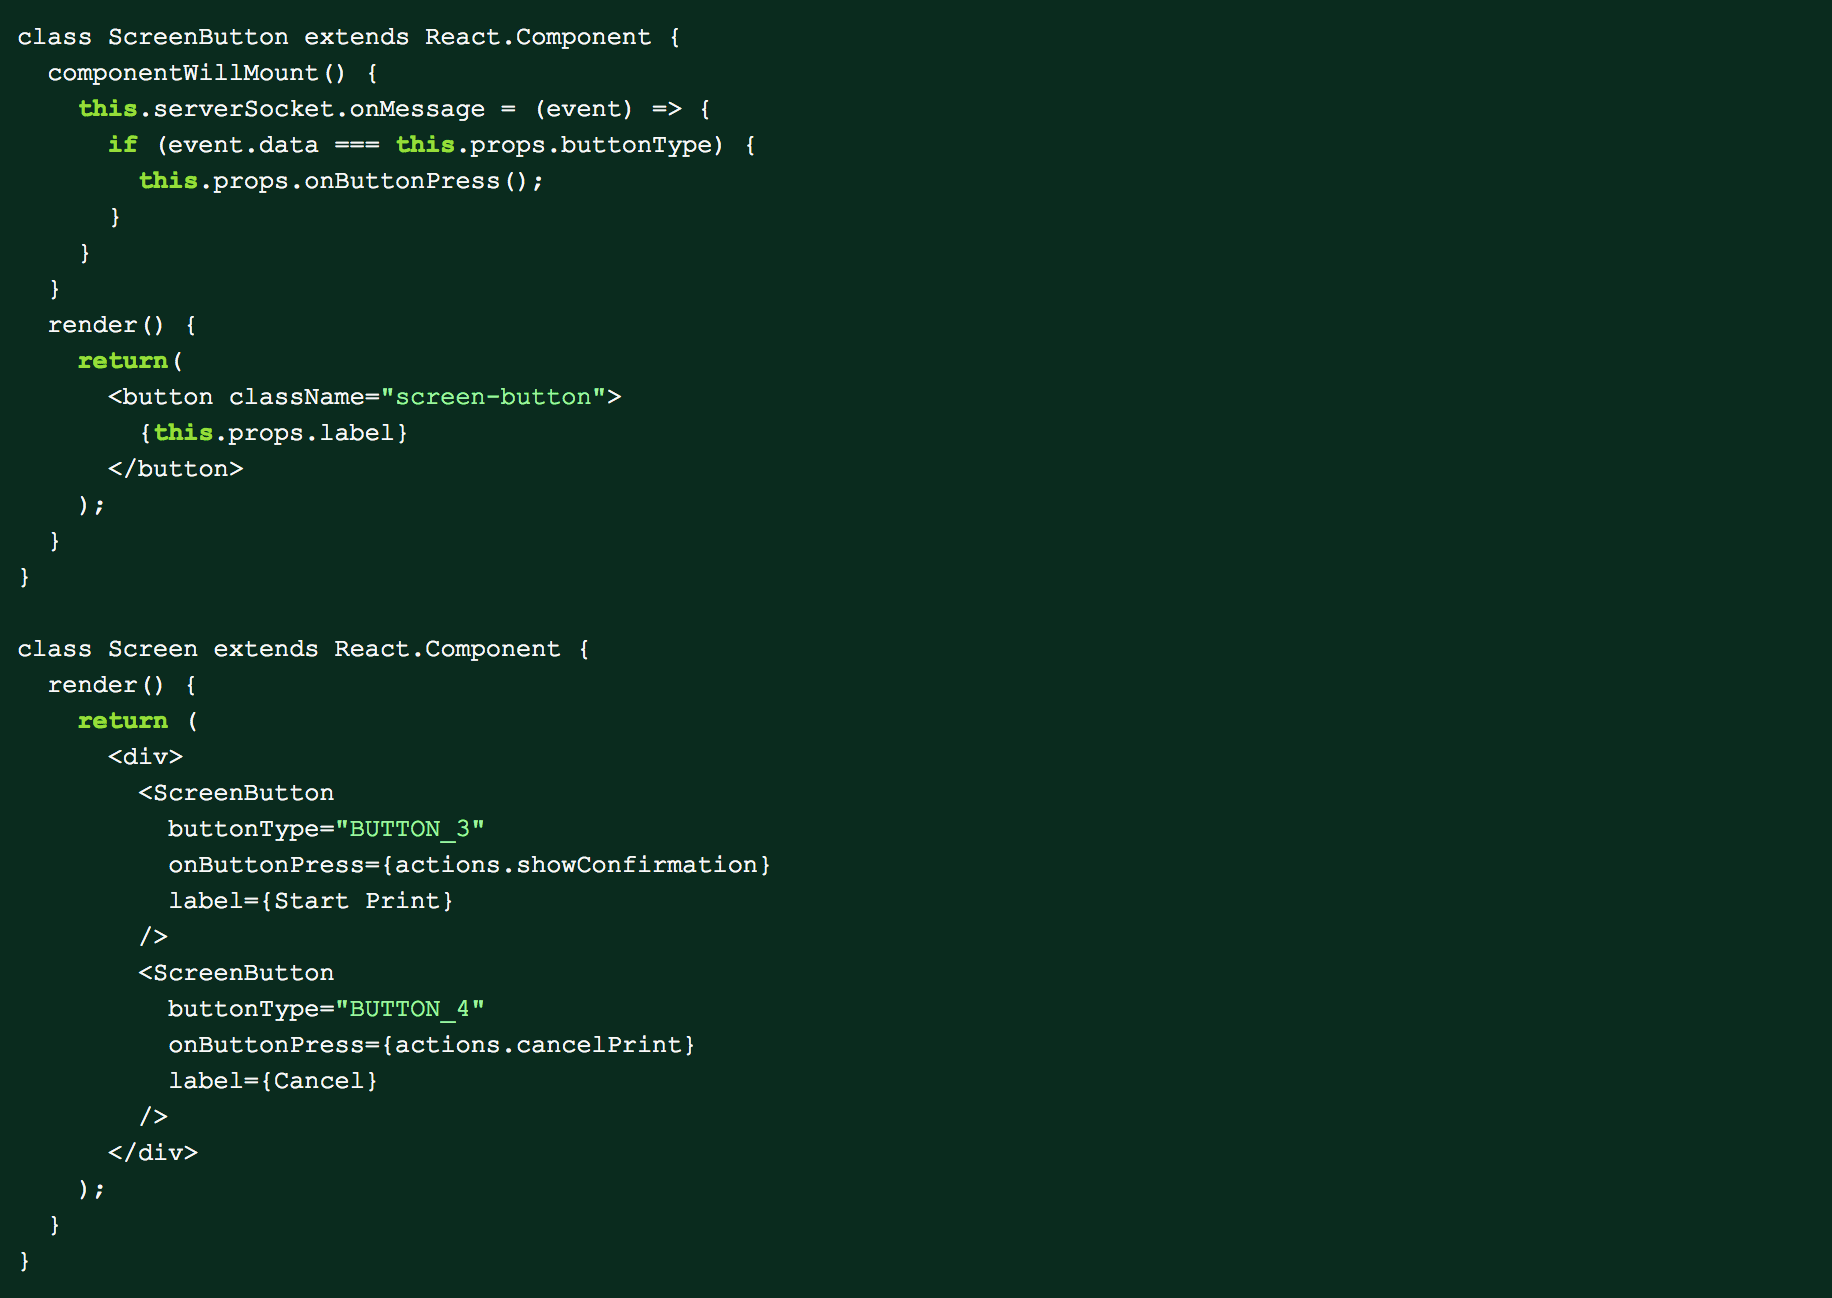
This code above was simple and worked without any problems but still left room for improvement. The main problem with this approach is the code that rendered the buttons and the code that responded to button clicks were separate. This made the application logic hard to follow and prone to errors since we could remove the code that rendered the button but accidently leave websocket listeners around. We improved on this design by creating a button class that could respond to websocket events. This way, the button component could listen to the event itself and expose an onButtonPress prop that would behave very similarly to a typical onClick handler. The Screen component could then use the new Button component like any other button in a normal React application.
This is just a small example of how working on our printer UI is different than a traditional web application. We have to deal with constraints such as being severely limited on screen real estate or user input mechanisms. But we also get increased flexibility in only having to build for a single screen resolution and browser.